No-Bake Greek Yogurt Jello Cheesecake is a delightful and refreshing treat perfect for any occasion. This incredible dessert brings together the creamy goodness of Greek yogurt and the vibrant flavors of jello in a no-bake format. If you’re looking for an easy yet impressive dish, this cheesecake is a fantastic choice that requires minimal effort and no oven time! It’s light, delicious, and guilt-free, making it suitable for summer gatherings, birthdays, or just a sweet indulgence after dinner.
Imagine tasting a slice of this cheesecake, where each bite melts in your mouth, offering a blend of flavors that awaken your senses. The combination of tangy Greek yogurt, sweet jello, and a crunchy crust creates a heavenly sensation that will make your taste buds dance with joy. You won’t need to be a master chef to pull this off. With simplified steps and accessible ingredients, you’ll learn to create this amazing dessert that will impress your family and friends.
This recipe is more than just a dessert; it’s a celebration of flavors and textures. True to its name, the No-Bake Greek Yogurt Jello Cheesecake is incredibly versatile. You can adjust the flavor of the jello to suit your personal preference, making this a go-to recipe for any season and event. Let’s explore why this dish is a must-try, how to prepare it, and the steps to serve it perfectly!
Why You’ll Love This Recipe
You may wonder why the No-Bake Greek Yogurt Jello Cheesecake stands out in the dessert landscape. Here are some compelling reasons that will make you fall head over heels for this recipe:
1. Easy to Make – With no baking required, this cheesecake allows for a fuss-free cooking experience. Simple implies no stress, making your time in the kitchen enjoyable.
2. Healthy Ingredients – Using Greek yogurt adds protein and reduces calories, so you can indulge guilt-free. This cheesecake is a great alternative to traditional cheesecakes.
3. Customization Options – The flavor combinations are endless! Change up the jello flavor to find your new favorite, from strawberries to blueberry or even lime.
4. No Heating Required – Perfect for hot summer days, you won’t heat up your kitchen with an oven.
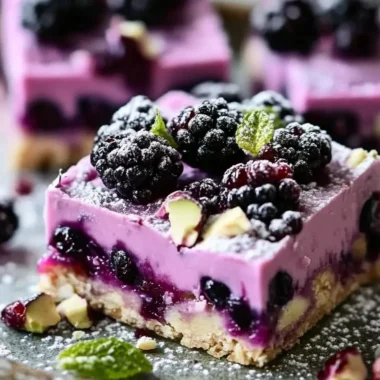
5. Visually Stunning – The vibrant colors of the jello layered in the creamy cheesecake create a beautiful presentation, making it a showstopper for gatherings.
6. Make Ahead Dessert – This cheesecake sets well, allowing you to prepare it ahead of time. This gives you more time to spend with your guests and less time in the kitchen!
These features make the No-Bake Greek Yogurt Jello Cheesecake a winner for any dessert lover. Consider sharing a slice at your next gathering, and watch the smiles spread across the room!
Preparation and Cooking Time
Making the No-Bake Greek Yogurt Jello Cheesecake takes a total of approximately 4 hours and 30 minutes, including chilling time. Here’s a breakdown of the time needed to prepare this dessert:
– Preparation Time: 30 minutes
– Chilling Time: 4 hours (or overnight for best results)
These timings may vary based on your kitchen tools and experience, but they provide a good estimate for planning your cooking session.
Ingredients
– For the Crust:
– 1 ½ cups graham cracker crumbs
– ½ cup unsalted butter, melted
– ¼ cup granulated sugar
– For the Filling:
– 2 cups Greek yogurt (plain or flavored)
– 1 cup powdered sugar
– 1 tablespoon vanilla extract
– 1 packet (0.25 oz) unflavored gelatin
– ½ cup water
– For the Jello Layer:
– 1 package (3 oz) jello (any flavor, e.g., strawberry, raspberry, or peach)
– 1 cup boiling water
– ½ cup cold water
Step-by-Step Instructions
Making the No-Bake Greek Yogurt Jello Cheesecake can be an enjoyable process. Just follow these straightforward steps:
1. Prepare the Crust:
– In a bowl, combine graham cracker crumbs, melted butter, and granulated sugar. Mix until well combined.
– Press the mixture firmly into the bottom of a 9-inch springform pan to create an even crust. Set aside.
2. Make the Cheesecake Filling:
– In a small bowl, sprinkle gelatin over ½ cup of water. Allow it to bloom for about 5 minutes.
– In a mixing bowl, combine Greek yogurt, powdered sugar, and vanilla extract. Blend until smooth and creamy.
– Heat the bloomed gelatin in the microwave for about 15 seconds, or until fully dissolved. Stir well.
– Gently fold the dissolved gelatin mixture into the yogurt mixture until fully incorporated.
3. Assemble the Cheesecake:
– Pour the filling over the prepared crust in the springform pan. Spread evenly with a spatula.
– Cover with plastic wrap and refrigerate for at least 2 hours or until set.
4. Prepare the Jello Layer:
– In a bowl, dissolve jello powder in 1 cup of boiling water. Stir until fully dissolved.
– Add ½ cup of cold water and mix well. Allow it to cool for a few minutes.
5. Add the Jello Layer:
– Once the cheesecake filling has set, carefully pour the cooled jello mixture over the cheesecake.
– Return the cheesecake to the refrigerator and chill for an additional 2 hours, or until the jello layer is firm.
6. Serve:
– Once fully chilled and set, carefully remove the cheesecake from the springform pan.
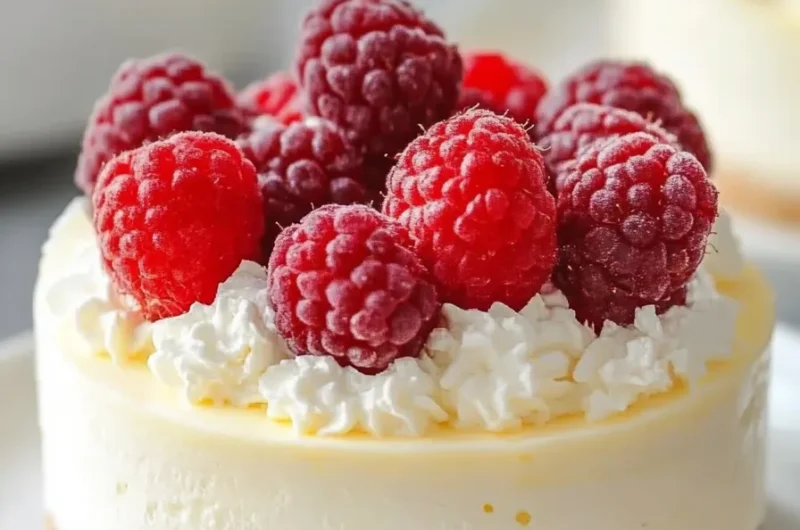
– Slice and serve chilled. Optional: garnish with fresh fruit or whipped cream if desired.
How to Serve
Serving the No-Bake Greek Yogurt Jello Cheesecake can enhance its appeal. Here are some tips to ensure it looks as delightful as it tastes:
1. Presentation: Use a decorative cake stand to elevate the appearance. A simple garnish of mint leaves or fresh fruit can further enhance its visual appeal.
2. Slice Size: Aim for smaller slices, which make it easier for guests to enjoy without feeling overwhelmed. Smaller portions also encourage seconds!
3. Beverage Pairings: With its refreshing taste, consider serving this cheesecake with herbal teas, sparkling water, or a light dessert wine.
4. Storing Leftovers: If you have any leftovers, keep them covered in the refrigerator. This cheesecake can typically be enjoyed for up to three days.
With these serving tips, you’ll create a memorable dessert experience for yourself and your guests, making each slice a delightful treat. Whether it’s a holiday, birthday, or just a casual get-together, the No-Bake Greek Yogurt Jello Cheesecake will surely be a delightful addition to any occasion!
Additional Tips
– Use Fresh Ingredients: Utilizing fresh fruit for your jello can greatly enhance the flavor of your No-Bake Greek Yogurt Jello Cheesecake. Avoid canned jello for the best taste.
– Experiment with Yogurt: Feel free to use flavored Greek yogurt instead of plain. Popular flavors like vanilla, strawberry, or lemon can add an extra layer of delight.
– Let It Set Longer: For optimum texture, allow your cheesecake to set overnight. This not only improves the flavor but also ensures the cheesecake holds its shape well.
– Top Creatively: Consider adding a layer of fresh fruit on top of your jello layer. This adds a beautiful garnish and complements the creamy cheesecake.
– Be Patient: When pouring the jello layer, ensure it’s cooled to room temperature to avoid melting the cheesecake underneath.
Recipe Variation
For those adventurous in the kitchen, here are some exciting variations you can try with the No-Bake Greek Yogurt Jello Cheesecake:
1. Chocolate Jello Layer: Swap the jello for a chocolate-flavored one to create a rich chocolate cheesecake. Pair it with dark chocolate Greek yogurt for a super decadent dessert.
2. Coconut Twist: Add shredded coconut to the crust or the filling for a tropical flair. Coconut Greek yogurt works exceptionally well for this variation.
3. Vegan Adaptation: Substitute Greek yogurt with a dairy-free yogurt alternative and use maple syrup instead of powdered sugar to cater to vegan diets.
4. Mixed Fruit Delight: Combine two jello flavors for a vibrant twist. A layer of strawberry-jello and peach-jello creates an eye-catching rainbow effect.
5. Nutty Delight: Incorporate finely chopped nuts like almonds or hazelnuts into the crust for an added crunch.
Freezing and Storage
– Storage: Always keep your cheesecake in an airtight container in the refrigerator. It’s best enjoyed fresh but can last up to 3 days.
– Freezing: Yes, you can freeze the No-Bake Greek Yogurt Jello Cheesecake! Wrap individual slices securely in plastic wrap and store them in a freezer-safe container. It can be frozen for up to 2 months.
– Thawing: To serve frozen slices, transfer them to the refrigerator for several hours before serving. Do not thaw at room temperature to maintain optimal texture.
Special Equipment
To create the perfect No-Bake Greek Yogurt Jello Cheesecake, the following equipment will come in handy:
– 9-inch Springform Pan: An essential tool for easy removal and presentation of your cheesecake.
– Mixing Bowls: You will need various sizes for mixing the crust, filling, and jello.
– Electric Mixer: For a smooth and creamy filling, an electric mixer is ideal.
– Rubber Spatula: Useful for folding ingredients gently to maintain the cheesecake’s airiness.
– Measuring Cups and Spoons: Accurate measurements ensure consistent results.
Frequently Asked Questions
Can I use low-fat Greek yogurt for this recipe?
Yes, low-fat Greek yogurt is a great choice. It won’t compromise texture and will still yield a delicious cheesecake.
What is the best way to cut the cheesecake without it falling apart?
For clean slices, use a sharp knife and dip it in hot water before cutting. Wipe the knife clean between cuts to maintain neat edges.
Is this cheesecake gluten-free?
To make it gluten-free, substitute regular graham crackers with gluten-free alternatives available in stores.
How can I add more flavor to the cheesecake?
Consider adding a splash of lemon juice or zest into the filling for a zesty twist. Spices like cinnamon or nutmeg can also elevate the flavor.
How long can this cheesecake be stored in the fridge?
The cheesecake can be stored in the refrigerator for up to three days, although its texture is best when fresh.
Conclusion
The No-Bake Greek Yogurt Jello Cheesecake is not merely a dessert; it’s an experience! With its vibrant colors, creamy texture, and delightful flavors, this cheesecake can quickly become a staple in your recipe arsenal. Its easy preparation method makes it accessible for bakers of all skill levels, and the endless customization options ensure that it can fit any occasion. So whether you’re hosting a summer barbecue, celebrating a birthday, or simply satisfying your sweet tooth, this cheesecake will not disappoint. Try this fantastic recipe and watch as it becomes a favorite among friends and family!

No-Bake Greek Yogurt Jello Cheesecake: An Amazing Ultimate Recipe
- Prep Time: 15 minutes
- Cook Time: 0 minutes
- Total Time: 15 minutes
Ingredients
– For the Crust:
– 1 ½ cups graham cracker crumbs
– ½ cup unsalted butter, melted
– ¼ cup granulated sugar
– For the Filling:
– 2 cups Greek yogurt (plain or flavored)
– 1 cup powdered sugar
– 1 tablespoon vanilla extract
– 1 packet (0.25 oz) unflavored gelatin
– ½ cup water
– For the Jello Layer:
– 1 package (3 oz) jello (any flavor, e.g., strawberry, raspberry, or peach)
– 1 cup boiling water
– ½ cup cold water
Instructions
Making the No-Bake Greek Yogurt Jello Cheesecake can be an enjoyable process. Just follow these straightforward steps:
1. Prepare the Crust:
– In a bowl, combine graham cracker crumbs, melted butter, and granulated sugar. Mix until well combined.
– Press the mixture firmly into the bottom of a 9-inch springform pan to create an even crust. Set aside.
2. Make the Cheesecake Filling:
– In a small bowl, sprinkle gelatin over ½ cup of water. Allow it to bloom for about 5 minutes.
– In a mixing bowl, combine Greek yogurt, powdered sugar, and vanilla extract. Blend until smooth and creamy.
– Heat the bloomed gelatin in the microwave for about 15 seconds, or until fully dissolved. Stir well.
– Gently fold the dissolved gelatin mixture into the yogurt mixture until fully incorporated.
3. Assemble the Cheesecake:
– Pour the filling over the prepared crust in the springform pan. Spread evenly with a spatula.
– Cover with plastic wrap and refrigerate for at least 2 hours or until set.
4. Prepare the Jello Layer:
– In a bowl, dissolve jello powder in 1 cup of boiling water. Stir until fully dissolved.
– Add ½ cup of cold water and mix well. Allow it to cool for a few minutes.
5. Add the Jello Layer:
– Once the cheesecake filling has set, carefully pour the cooled jello mixture over the cheesecake.
– Return the cheesecake to the refrigerator and chill for an additional 2 hours, or until the jello layer is firm.
6. Serve:
– Once fully chilled and set, carefully remove the cheesecake from the springform pan.
– Slice and serve chilled. Optional: garnish with fresh fruit or whipped cream if desired.
Nutrition
- Serving Size: 8 slices
- Calories: 230 kcal
- Fat: 10g
- Protein: 5g