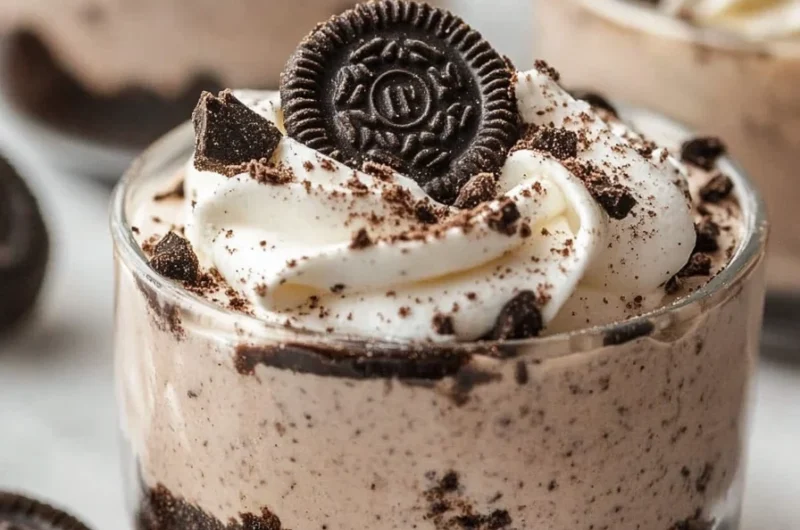
Oreo No-Bake Cheesecake Cups are a delightful treat that combines the rich flavors of chocolate and cream cheese in a simple, yet incredible dessert. These individual cups are not only easy to make but also perfect for entertaining guests or satisfying your sweet tooth after a long day. The creamy filling complements the crunchy Oreo crust, creating a harmonious blend of textures and flavors in each bite. If you’ve ever craved a decadent cheesecake without the fuss of baking, look no further. These cups deliver an amazing flavor experience that will excite your taste buds!
Imagine indulging in a delicious dessert that requires minimal effort yet looks stunning when served. The Oreo No-Bake Cheesecake Cups are the answer to your dessert dilemmas! With their perfect balance of sweetness and creaminess, they’re incredibly satisfying. Whether it’s for a family gathering, a celebration, or just a sweet treat for yourself, this dessert is bound to impress.
In this guide, you will discover the reasons to love this recipe, the easy preparation and cooking times, and the complete ingredient list you need to create these delightful dessert cups. Plus, the step-by-step instructions will ensure your success in crafting this perfect dessert. Let’s explore what makes the Oreo No-Bake Cheesecake Cups a must-try for everyone!
Why You’ll Love This Recipe
There are countless reasons to fall in love with Oreo No-Bake Cheesecake Cups, but a few stand out as particularly enticing. Here’s why this recipe is worth making:
1. No Baking Required – Forget the oven! This no-bake recipe is straightforward, making it perfect for novice bakers or those pressed for time.
2. Deliciously Decadent – The combination of rich cream cheese and sweet Oreos creates an indulgent treat that is simply irresistible.
3. Individual Portions – These cups allow for easy serving and portion control, making them a hit at any event.
4. Quick to Prepare – You can whip these up in under 30 minutes, and they only need chilling time to set.
5. Easily Customizable – Feel free to switch up the toppings or mix-ins for a unique spin on the classic recipe.
6. Party Favorite – Their appealing presentation and rich flavors make them an instant crowd-pleaser.
With these attributes, it’s clear why Oreo No-Bake Cheesecake Cups have gained a passionate following. Each cup is a delightful invitation to indulge, promising to leave everyone longing for more.
Preparation and Cooking Time
Creating Oreo No-Bake Cheesecake Cups is quick and easy. Here’s a breakdown of the time involved:
– Preparation Time: 20 minutes
– Chilling Time: 2 hours (or more, for better results)
– Total Time: Approximately 2 hours and 20 minutes
This makes Oreo No-Bake Cheesecake Cups an excellent choice for last-minute dessert planning or a delightful planned treat.
Ingredients
– 1 package (15.35 oz) Oreo cookies
– 1/2 cup unsalted butter, melted
– 8 oz cream cheese, softened
– 1/2 cup granulated sugar
– 1 teaspoon vanilla extract
– 1 cup whipped topping
– Additional crushed Oreos for topping (optional)
Step-by-Step Instructions
Crafting these delicious Oreo No-Bake Cheesecake Cups can be done in several easy steps:
1. Prepare Oreo Crust:
– In a food processor, crush the Oreo cookies into fine crumbs.
– Transfer the crumbs to a bowl and mix in the melted butter until well combined.
2. Assemble the Base:
– Spoon about 2 tablespoons of the Oreo mixture into each serving cup or glass.
– Press the crumbs down to form an even layer, then set aside.
3. Create Cheesecake Filling:
– In a mixing bowl, beat the softened cream cheese until smooth.
– Add the granulated sugar and vanilla extract, mixing until fully incorporated.
4. Fold in Whipped Topping:
– Gently fold the whipped topping into the cream cheese mixture until no streaks remain. Be careful not to deflate the mixture.
5. Fill the Cups:
– Spoon the cheesecake filling into each cup on top of the Oreo crust.
6. Chill:
– Place the filled cups in the refrigerator and allow them to chill for at least 2 hours to set.
7. Finish with Toppings:
– Before serving, top with additional crushed Oreos or a dollop of whipped topping for extra flair.
These straightforward instructions will help you create delicious Oreo No-Bake Cheesecake Cups with ease!
How to Serve
Serving Oreo No-Bake Cheesecake Cups can elevate your dessert experience. Consider the following tips to present these delightful treats beautifully:
1. Opt for Clear Cups: Use transparent cups to showcase the stunning layers of the dessert, making each component visible and appealing.
2. Garnish Creatively: Add a sprig of mint, chocolate shavings, or fresh fruit on top for an elegant touch.
3. Chilled Serving: Serve the cups cold to maintain their creamy texture. They are best enjoyed straight from the fridge.
4. Pairing Suggestions: These cups go well with coffee or a glass of milk, enhancing the flavors.
5. Perfect for Sharing: Place multiple cups on a decorative tray to create an inviting dessert table at parties or gatherings.
By focusing on presentation and serving suggestions, you can create a memorable dessert experience that your guests will love. Enjoy making these delicious Oreo No-Bake Cheesecake Cups and impress everyone with your culinary skills!
Additional Tips
– Use High-Quality Ingredients: For the best flavor, opt for fresh cream cheese and brand-name Oreos. This enhances the overall quality of your Oreo No-Bake Cheesecake Cups.
– Allow Cream Cheese to Soften: To ensure a smooth filling, make sure to let your cream cheese sit out at room temperature for about an hour before using it. This step will help in blending it evenly.
– Chill for Optimal Texture: For the best taste and texture, allow the cups to set in the fridge overnight. This will enable the flavors to meld beautifully.
– Experiment with Flavors: Consider adding different flavor extracts, such as almond or orange, to the cheesecake mixture for a unique twist.
– Serve with Style: Consider garnishing with whipped cream and chocolate shavings for an elegant dessert presentation.
Recipe Variations
Feel free to get creative with your Oreo No-Bake Cheesecake Cups! Here are a few delightful variations you might enjoy:
1. Peanut Butter Twist: Add ½ cup of creamy peanut butter to the cheesecake filling for a delicious peanut butter-flavored variation.
2. Mint Chocolate: Incorporate 1 teaspoon of peppermint extract into the cheesecake mixture for a refreshing mint chocolate experience.
3. Fruit Fusion: Layer in fresh fruits like strawberries or blueberries between the crust and cheesecake filling for a fruity surprise.
4. No Sugar Added: Substitute the sugar with a sugar-free alternative for a guilt-free indulgence that tastes just as delicious.
5. Cookie Crust Variations: Swap out Oreos for different types of cookies, such as chocolate chip or gingersnaps, for a different flavor experience.
Freezing and Storage
– Storage: Keep the Oreo No-Bake Cheesecake Cups covered in the fridge. They should remain fresh for about 4-5 days, allowing you to enjoy them over time.
– Freezing: You can freeze these cups for future enjoyment. Just make sure they are well-covered (using plastic wrap or an airtight container) to prevent freezer burn. They can last up to 3 months in the freezer.
Special Equipment
To prepare your Oreo No-Bake Cheesecake Cups successfully, gather these essential tools:
– Mixing bowls
– Food processor or zip-top bags for crushing Oreos
– Electric mixer for blending the cheesecake filling
– Measuring cups and spoons
– Serving cups or glasses for the final presentation
Frequently Asked Questions
Can I use reduced-fat cream cheese for this recipe?
Yes, reduced-fat cream cheese can be used, but it may slightly alter the texture and creaminess of the filling.
How long do I need to chill the cheesecake cups?
For the best results, chill them for at least 2 hours. However, an overnight chill is recommended to enhance the flavors.
Can I use dairy-free cream cheese?
Absolutely! Dairy-free cream cheese can be substituted for a delicious vegan version of these cups.
What if I don’t have whipped topping?
You can make homemade whipped cream or use whipped mascarpone cheese as an alternative.
Are these cheesecake cups suitable for gluten-free diets?
Yes! Simply replace the Oreos with gluten-free cookies, and you can enjoy these treats without worry.
Conclusion
Oreo No-Bake Cheesecake Cups are a fabulous blend of taste and simplicity. With their creamy filling and crunchy crust, they are perfect for any occasion. Whether you’re preparing for a party, a family dinner, or just a treat for yourself, these cups are sure to please. So, indulge in these delightful cheesecakes and experience a dessert that doesn’t require an oven but packs a punch of delicious flavor!
Oreo No-Bake Cheesecake Cups: An Amazing Ultimate Recipe for Everyone
- Prep Time: 15 minutes
- Cook Time: N/A
- Total Time: 30 minute
Ingredients
– 1 package (15.35 oz) Oreo cookies
– 1/2 cup unsalted butter, melted
– 8 oz cream cheese, softened
– 1/2 cup granulated sugar
– 1 teaspoon vanilla extract
– 1 cup whipped topping
– Additional crushed Oreos for topping (optional)
Instructions
Crafting these delicious Oreo No-Bake Cheesecake Cups can be done in several easy steps:
1. Prepare Oreo Crust:
– In a food processor, crush the Oreo cookies into fine crumbs.
– Transfer the crumbs to a bowl and mix in the melted butter until well combined.
2. Assemble the Base:
– Spoon about 2 tablespoons of the Oreo mixture into each serving cup or glass.
– Press the crumbs down to form an even layer, then set aside.
3. Create Cheesecake Filling:
– In a mixing bowl, beat the softened cream cheese until smooth.
– Add the granulated sugar and vanilla extract, mixing until fully incorporated.
4. Fold in Whipped Topping:
– Gently fold the whipped topping into the cream cheese mixture until no streaks remain. Be careful not to deflate the mixture.
5. Fill the Cups:
– Spoon the cheesecake filling into each cup on top of the Oreo crust.
6. Chill:
– Place the filled cups in the refrigerator and allow them to chill for at least 2 hours to set.
7. Finish with Toppings:
– Before serving, top with additional crushed Oreos or a dollop of whipped topping for extra flair.
These straightforward instructions will help you create delicious Oreo No-Bake Cheesecake Cups with ease!
Nutrition
- Serving Size: 6 cups
- Calories: 320 kcal
- Fat: 18g
- Protein: 5g